Introduction
Imagine waking up to the delightful aroma of freshly baked pastries wafting through your kitchen. The warmth of the oven, the anticipation of a sweet treat—this is the magic of homemade pastries. In this article, we will dive into the world of delectable desserts with a focus on a timeless classic: the 4 Ingredient Cherry Danish. This recipe is not just about the final result but also about the journey of creating something special from scratch.
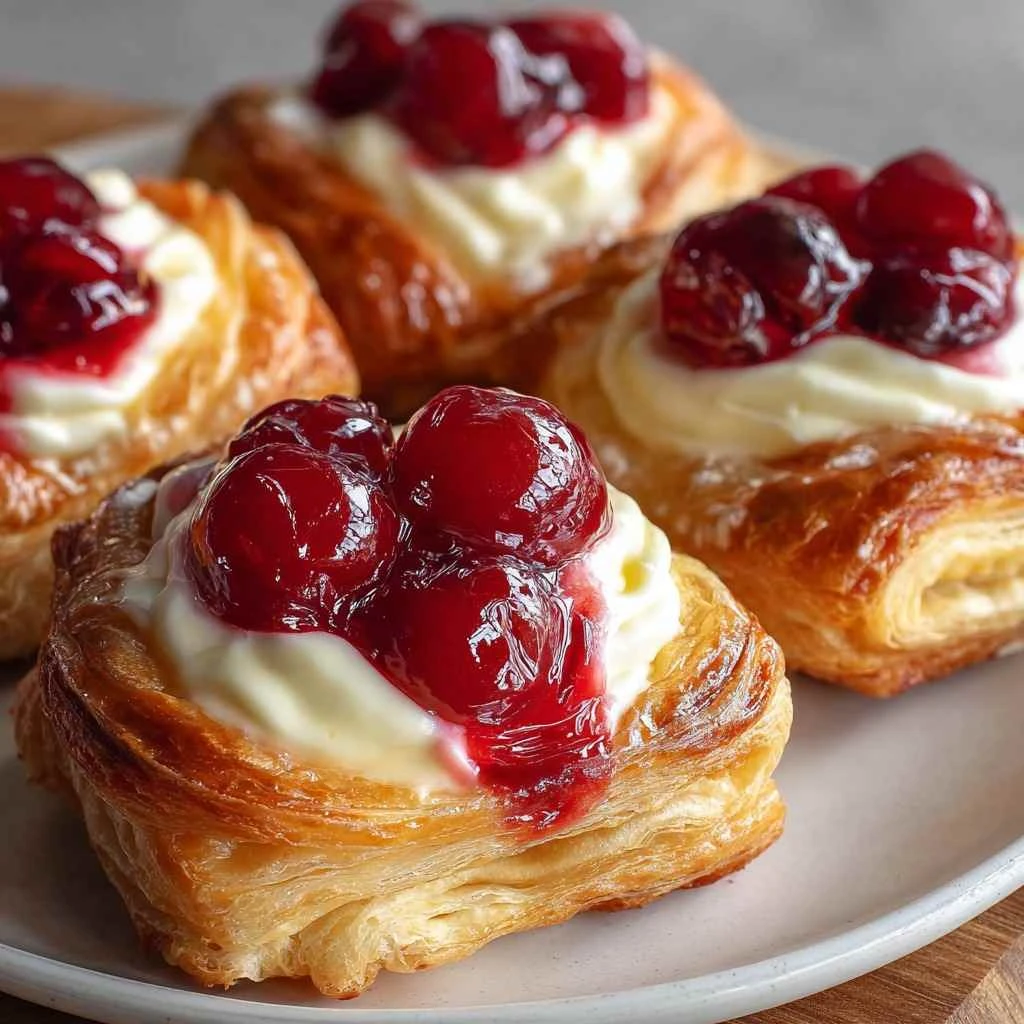
Originating from the heart of Danish pastry tradition, the Cherry Danish holds a special place in the realm of sweet indulgences. With its flaky layers, tangy cherry filling, and a touch of sweetness, this pastry is a true delight for the senses. What makes this recipe truly exceptional is its simplicity; with just four basic ingredients, you can create a decadent treat that rivals those from a high-end bakery.
Whether you are a seasoned baker looking to expand your repertoire or a novice eager to embark on a culinary adventure, this recipe is perfect for all skill levels. So, roll up your sleeves, preheat the oven, and let’s uncover the secrets of making the perfect 4 Ingredient Cherry Danish.
Before we delve into the specifics of the recipe, let’s explore why this particular pastry holds a special place in the hearts of many and why mastering the art of making it at home can be a truly rewarding experience.
Why You’ll Love This Recipe
What sets the 4 Ingredient Cherry Danish apart from other pastries is its delightful combination of simplicity and sophistication. The ease of preparation combined with the exquisite flavors makes this recipe a standout choice for any occasion. Here are a few reasons why you’ll fall in love with this Cherry Danish:
The minimal ingredient list means you can whip up a batch in no time, perfect for those spontaneous cravings or last-minute guests. The buttery, flaky layers create a textural contrast to the luscious cherry filling, resulting in a sensory experience that is truly unforgettable. Additionally, the versatility of this recipe allows for endless customization, whether you prefer a classic cherry filling or want to experiment with other fruit variations.
For those with dietary restrictions, the 4 Ingredient Cherry Danish can easily be adapted to suit various needs, making it a inclusive treat for everyone to enjoy. Whether you are vegan, gluten-free, or simply looking for a lighter option, this recipe offers flexibility without compromising on taste or quality.
Indulge in the joy of creating something from scratch, savor the process of rolling out the dough, spooning the filling, and watching your pastries transform into golden perfection in the oven. The satisfaction of presenting a tray of freshly baked Cherry Danish to your loved ones is a feeling like no other, making this recipe a true labor of love.
Now that you know why this recipe is so special, let’s gather our ingredients and get ready to bake up a batch of these irresistible Cherry Danish pastries.
4 Ingredient Cherry Danish
Keep crescent rolls intact as one log, slice into rounds, flatten centers, fill with sweetened cream cheese and cherry pie filling, then bake for flaky pull-apart pastries ready in 20 minutes.
Ingredients
- 1 can (8 oz) Pillsbury crescent rolls
- 4 oz cream cheese, softened
- 4 tbsp powdered sugar
- 7-8 tbsp cherry pie filling
Step-by-Step Instructions
Step 1: Prep Oven
Preheat oven to 375°F. Line baking sheet with parchment paper.
Step 2: Slice Crescent Log
Keep crescent roll tube unrolled as one solid log. Slice into ½-inch thick rounds (7-8 pieces).
Step 3: Shape Danish
Place rounds on baking sheet. Use fingers to press deep center wells, keeping edges raised like mini pie crusts.
Step 4: Make Cream Cheese Filling
Mix softened cream cheese and powdered sugar until smooth and spreadable.
Step 5: Fill Pastries
Spoon 1-1½ tbsp cream cheese mixture into each center. Top with 1 tbsp cherry pie filling.
Step 6: Bake & Cool
Bake 12-15 minutes until golden. Cool 5 minutes before serving.
Expert Tips
- Room temperature cream cheese mixes smoothly without lumps.
- Press centers firmly—edges puff up during baking to contain filling.
- Don’t overfill; cherry juice will bubble during baking.
- Slice with serrated knife for clean crescent rounds.
- Perfect warm from oven or at room temperature.
Variations & Substitutions
Blueberry: Swap cherry filling for blueberry pie filling.
Lemon: Cream cheese + lemon curd + powdered sugar glaze.
Apple: Cinnamon apple pie filling + streusel topping.
Chocolate: Nutella + fresh raspberries.
Savory: Ham + cheddar (omit powdered sugar).
Storage
Room temperature: 1 day covered.
Refrigerate: 3 days. Microwave 10 seconds to rewarm.
Freeze baked: 1 month.
Serving Suggestions
Serve with:
- Fresh fruit platter
- Coffee or cappuccino
- Yogurt parfait
- Brunch mimosa station
Great for bake sales, teacher gifts, or breakfast potlucks.
FAQs
Filling leaks?
Press edges higher or bake on silpat mat.
Powdered sugar lumps?
Sift first or use hand mixer.
No crescent rolls?
Puff pastry squares work using same method.
Glaze needed?
Mix ½ cup powdered sugar + 1 tbsp milk.
Make ahead?
Assemble, cover, refrigerate overnight before baking.
Final Thoughts
4 Ingredient Cherry Danish proves bakery perfection needs zero skills—just slice, fill, bake, devour.
Call to Action
Brunch showstopper ready, bake sale superstar, classic cherry or blueberry twist?

4 Ingredient Cherry Danish
A delightful pastry with flaky layers, tangy cherry filling, and cream cheese, made with just four basic ingredients. Perfect for any occasion and skill level.
Ingredients
- 2 puff pastry sheets
- 1 can cherry pie filling
- 4 oz cream cheese
- 1 egg (for egg wash)
Directions
-
Preheat the oven to 400°F (200°C) and line a baking sheet with parchment paper.
-
Roll out the puff pastry sheets and cut each sheet into 6 equal squares.
-
In a bowl, mix the cream cheese until smooth.
-
Place a spoonful of cream cheese in the center of each puff pastry square.
-
Top the cream cheese with a spoonful of cherry pie filling.
-
Fold the corners of each square towards the center, creating a pinwheel shape. Press to seal the edges.
-
Brush the pastries with egg wash for a golden finish.
-
Bake for 15-18 minutes or until the pastries are puffed and golden brown.
-
Serve warm and enjoy!