Introduction
Imagine the delightful aroma of freshly baked goods wafting through your kitchen, bringing back memories of cozy gatherings and sweet indulgences. In this article, we delve into the world of Vintage 7 Layer Bars, a timeless dessert that never fails to captivate with its layers of flavors and textures. From its humble origins to its enduring popularity, this recipe holds a special place in the hearts of many dessert enthusiasts.
As we embark on this culinary journey, we will uncover the secrets behind what makes Vintage 7 Layer Bars a beloved classic. Whether you are a seasoned baker or a novice in the kitchen, this recipe offers a perfect blend of simplicity and decadence, making it a must-try for anyone with a sweet tooth.
Join us as we explore the magic of these delectable bars, unraveling the history and charm that have made them a staple in dessert tables for generations. Get ready to indulge in a treat that promises to satisfy your cravings and transport you to a realm of sugary bliss.
Prepare your baking tools and let your creativity shine as we unlock the wonders of Vintage 7 Layer Bars, one layer at a time.

Why You’ll Love This Recipe
These Vintage 7 Layer Bars are a delightful combination of flavors and textures that will tantalize your taste buds with every bite. The ease of preparation coupled with the rich, indulgent taste makes this recipe a standout choice for any occasion.
One of the best features of this recipe is its versatility. Whether you prefer a gooey, chewy texture or a crunchy, nutty bite, these bars can be customized to suit your preferences. Additionally, the use of simple, pantry-staple ingredients ensures that you can whip up a batch of these bars whenever a craving strikes.
For those with dietary restrictions, this recipe can easily be adapted to accommodate various needs. With options for gluten-free, dairy-free, or vegan substitutions, everyone can enjoy the irresistible allure of Vintage 7 Layer Bars.
Indulge in a taste of nostalgia with each mouthful of these bars, and experience the joy of savoring a treat that never goes out of style.
Ingredients
Prepare to embark on a journey of flavors by gathering the following ingredients:
– 1 cup graham cracker crumbs
– 1/2 cup unsalted butter, melted
– 1 cup semisweet chocolate chips
– 1 cup butterscotch chips
– 1 cup shredded coconut
– 1 cup chopped nuts (walnuts or pecans work well)
– 1 can sweetened condensed milk
Feel free to experiment with different types of nuts or chocolate for a unique twist on this classic recipe. You can also explore dairy-free or vegan alternatives to cater to specific dietary preferences.
Step-by-Step Instructions
Let’s dive into the simple yet satisfying process of creating Vintage 7 Layer Bars:
1. Preheat your oven to 350°F (175°C) and grease a 9×13-inch baking pan.
2. In a mixing bowl, combine the graham cracker crumbs and melted butter. Press this mixture into the bottom of the prepared pan.
3. Sprinkle the chocolate chips, butterscotch chips, coconut, and nuts over the graham cracker layer.
4. Pour the sweetened condensed milk evenly over the top of the layers.
5. Bake in the preheated oven for 25-30 minutes or until the edges are golden brown.
6. Allow the bars to cool completely before cutting them into squares and serving.
For best results, refrigerate the bars for a couple of hours to help them set before slicing. These bars are perfect for sharing with family and friends, or simply indulging in a moment of sweet bliss all to yourself.
Expert Tips for Success
To ensure that your Vintage 7 Layer Bars turn out perfectly every time, consider the following expert tips:
– Use high-quality ingredients for the best flavor and texture.
– Press the graham cracker crust firmly into the pan to create a solid base for the layers.
– Experiment with different combinations of nuts and chocolate to customize the bars to your liking.
– Allow the bars to cool completely before cutting to achieve clean, neat slices.
By following these tips, you can elevate your baking experience and enjoy flawless Vintage 7 Layer Bars that are sure to impress.
Variations and Substitutions
While the classic recipe for Vintage 7 Layer Bars is a tried-and-true favorite, feel free to explore creative variations to suit your taste preferences:
– Swap the butterscotch chips for white chocolate chips for a different flavor profile.
– Replace the nuts with dried fruit for a unique twist on the traditional recipe.
– Experiment with different types of cookies or crackers for the base layer to add a new dimension of taste.
– Drizzle caramel sauce over the top of the bars for an extra layer of sweetness.
Don’t be afraid to get creative in the kitchen and put your own spin on this timeless dessert. The possibilities are endless when it comes to customizing Vintage 7 Layer Bars to suit your individual preferences.
Serving Suggestions
When it comes to serving Vintage 7 Layer Bars, the options are as varied as the layers themselves:
– Pair these bars with a scoop of vanilla ice cream for a decadent dessert experience.
– Serve them alongside a steaming cup of coffee or hot cocoa for a cozy treat on a chilly day.
– Garnish the bars with a sprinkle of sea salt for a sweet and salty flavor contrast.
– Pack them in a decorative tin or box to gift to friends and loved ones for a thoughtful homemade treat.
However you choose to enjoy these bars, they are sure to bring a smile to your face and warmth to your heart with each delicious bite.
FAQs
Here are answers to some common questions you may have about Vintage 7 Layer Bars:
Can I freeze these bars?
Absolutely! Vintage 7 Layer Bars freeze well and can be stored in an airtight container in the freezer for up to 3 months. Simply thaw them in the refrigerator before serving.
Can I use a different type of condensed milk?
While sweetened condensed milk is traditionally used in this recipe, you can experiment with condensed milk alternatives such as coconut condensed milk for a unique twist.
How long do these bars stay fresh?
When stored in an airtight container at room temperature, Vintage 7 Layer Bars can stay fresh for up to a week. For longer storage, refrigerate them to maintain their texture and flavor.
Can I add other mix-ins to the layers?
Absolutely! Feel free to get creative with the layers by adding ingredients like crushed pretzels, toffee bits, or even mini marshmallows to customize the bars to your liking.
Final Thoughts
As we come to the end of our exploration into the world of Vintage 7 Layer Bars, we hope you have been inspired to embark on your own baking adventure and create these delightful treats in your own kitchen. With a perfect balance of sweetness, crunch, and chewiness, these bars are sure to become a favorite among your family and friends.
So, roll up your sleeves, preheat your oven, and let the magic of Vintage 7 Layer Bars unfold before you. Whether you’re a seasoned baker or a novice enthusiast, this recipe offers a delicious opportunity to indulge in a classic dessert that never goes out of style.
Call to Action
Why not gather the ingredients and try your hand at making Vintage 7 Layer Bars today? Share your baking journey with us and spread the joy of homemade goodness with everyone you love. Happy baking!

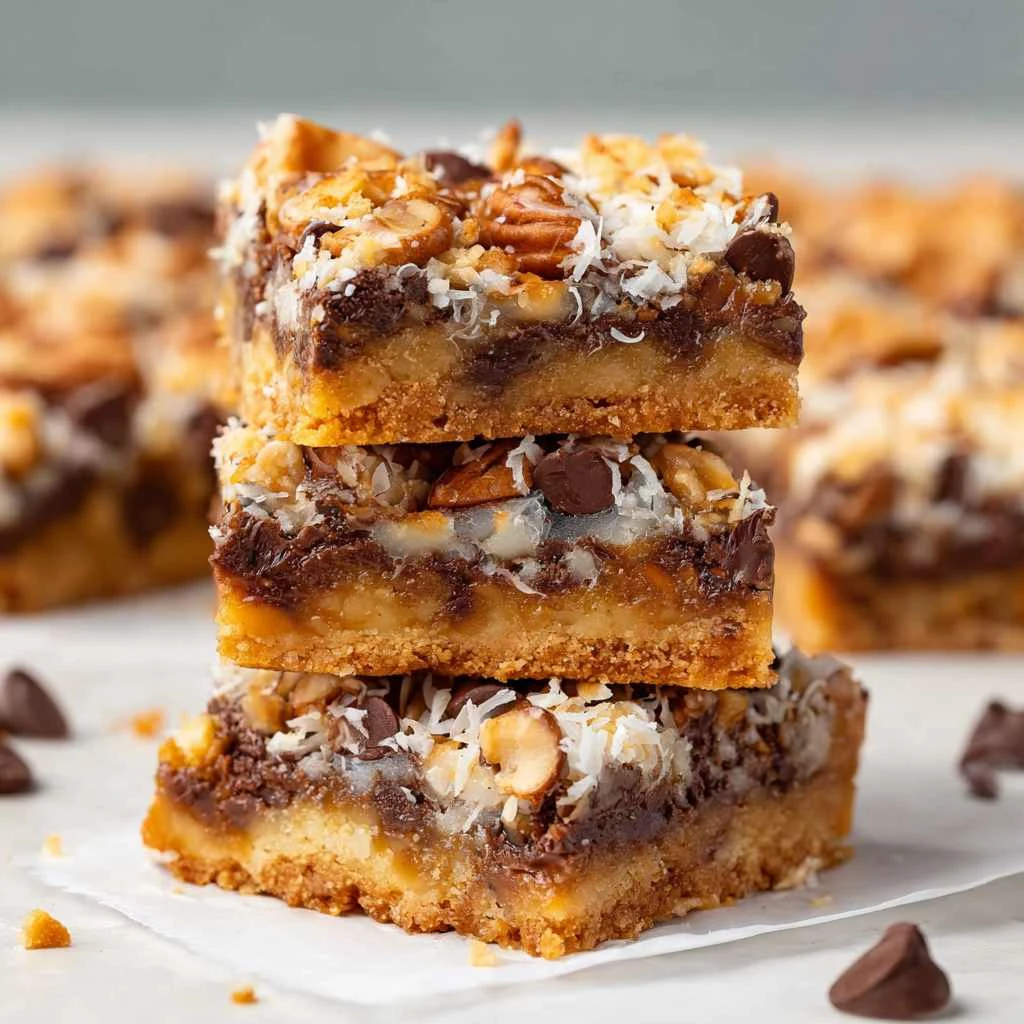
Vintage 7 Layer Bars
Vintage 7 Layer Bars are a timeless dessert that combines layers of flavors and textures to create a rich and indulgent treat. This classic recipe offers a perfect blend of simplicity and decadence, making it a must-try for anyone with a sweet tooth.
Ingredients
- 1 cup graham cracker crumbs
- 1/2 cup unsalted butter, melted
- 1 cup semisweet chocolate chips
- 1 cup butterscotch chips
- 1 cup shredded coconut
- 1 cup chopped nuts (walnuts or pecans)
- 1 can sweetened condensed milk
Directions
-
Preheat the oven to 350°F (175°C) and grease a 9×13-inch baking pan.
-
In a bowl, mix graham cracker crumbs and melted butter, then press into the pan.
-
Sprinkle chocolate chips, butterscotch chips, coconut, and nuts over the crust.
-
Pour sweetened condensed milk evenly over the layers.
-
Bake for 25-30 minutes until edges are golden brown.
-
Cool completely, then cut into squares and serve.
-
For best results, refrigerate for a couple of hours before slicing.