Introduction
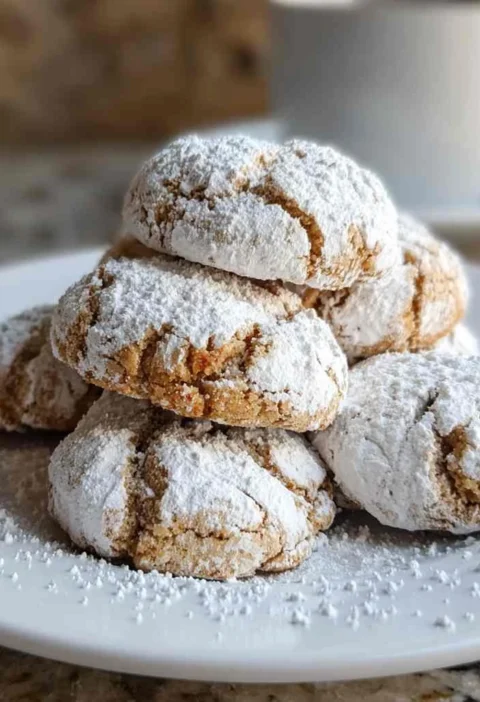
Imagine the delightful aroma of freshly baked fig x cookies wafting through your kitchen, signaling the arrival of the holiday season. These sweet treats are not just cookies; they are a symbol of warmth, joy, and togetherness. In this article, we will explore the magic of fig x cookies, from the best recipes to baking tips and everything in between.
Fig x cookies have a rich history that dates back centuries, making them a beloved holiday tradition in many cultures. The combination of sweet figs, warm spices, and buttery dough creates a flavor profile that is both nostalgic and comforting. Whether enjoyed with a cup of hot cocoa by the fireplace or shared with loved ones at a festive gathering, fig x cookies hold a special place in the hearts of many.
One of the reasons why fig x cookies are a must-try during the holiday season is their versatility. From traditional recipes passed down through generations to modern twists that cater to dietary preferences, there is a fig x cookie for everyone. Whether you prefer chewy, crispy, gluten-free, or vegan options, the world of fig x cookies offers endless possibilities.
Join us on a culinary journey as we unravel the secrets of the best fig x cookies recipe, explore holiday baking tips, delve into the nutritional facts of fig x cookies, and discover creative ways to incorporate these delectable treats into your festive celebrations.
Why You’ll Love Fig X Cookies

These fig x cookies are more than just a holiday treat—they are a celebration of flavor, texture, and tradition. Each bite is a harmonious blend of sweetness from the figs, warmth from the spices, and richness from the dough. Whether you are a seasoned baker or a novice in the kitchen, these cookies are a joy to make and a delight to savor.
For those with dietary restrictions, fig x cookies offer a versatile canvas for exploration. With gluten-free and vegan options readily available, everyone can indulge in the magic of these holiday cookies without compromising on taste or texture. The best part? You can customize the recipe to suit your preferences, making fig x cookies a guilt-free pleasure for all.
As you bake these fig x cookies, you will experience the therapeutic benefits of creating something from scratch. The process of measuring, mixing, and shaping the dough is not just about making cookies; it is about nurturing your creativity and sharing a piece of your heart with others. Whether you bake them alone or with your kids, fig x cookies are a delicious way to bond and create lasting memories.
So, roll up your sleeves, preheat your oven, and let the magic of fig x cookies transport you to a world of warmth and sweetness. Get ready to embark on a culinary adventure filled with laughter, love, and the irresistible allure of freshly baked cookies.
Ingredients
Before you dive into the world of fig x cookies, let’s take a look at the key ingredients that make these treats so special. Here is a list of ingredients you’ll need to create the perfect batch of fig x cookies:
1. Dried figs: These sweet and chewy gems are the star of the show, imparting a rich flavor and texture to the cookies.
2. All-purpose flour: Provides structure and volume to the dough, ensuring the cookies have the perfect consistency.
3. Butter: Adds richness and a buttery flavor that complements the sweetness of the figs.
4. Sugar: Balances the natural sweetness of the figs and enhances the overall flavor of the cookies.
5. Eggs: Bind the ingredients together and help the cookies achieve a soft, chewy texture.
6. Baking powder: Acts as a leavening agent to give the cookies a light and airy crumb.
7. Spices (cinnamon, nutmeg, cloves): Infuse the cookies with warm, aromatic flavors that evoke the holiday spirit.
8. Vanilla extract: Adds a subtle sweetness and depth of flavor to the cookies.
Feel free to experiment with different types of flour, sweeteners, or spices to customize the recipe to your liking. For a healthier twist, you can also explore alternative ingredients such as almond flour, coconut sugar, or maple syrup. The beauty of fig x cookies lies in their adaptability, so don’t be afraid to get creative in the kitchen.
Step-by-Step Instructions
Now that you have gathered your ingredients, it’s time to dive into the delightful process of making fig x cookies. Follow these simple steps to create a batch of irresistible holiday treats that will leave your taste buds craving for more:
1. Preheat your oven to 350°F (180°C) and line a baking sheet with parchment paper.
2. In a mixing bowl, cream together the butter and sugar until light and fluffy.
3. Add the eggs one at a time, beating well after each addition. Stir in the vanilla extract.
4. In a separate bowl, combine the flour, baking powder, and spices. Gradually add the dry ingredients to the wet ingredients, mixing until a dough forms.
5. Fold in the chopped dried figs until evenly distributed throughout the dough.
6. Using a cookie scoop or spoon, portion out the dough and place onto the prepared baking sheet. Flatten each cookie slightly with the back of a spoon.
7. Bake the cookies for 10-12 minutes or until the edges are golden brown. Allow them to cool on the baking sheet for a few minutes before transferring to a wire rack to cool completely.
Pro Tip: For chewier cookies, slightly underbake them and let them cool on the baking sheet before transferring.

Expert Tips for Success
For the best results when making fig x cookies, keep these expert tips in mind:
1. Use room temperature ingredients to ensure even mixing and proper texture in the dough.
2. Don’t overmix the dough once the dry ingredients are added to prevent tough cookies.
3. For a burst of flavor, soak the dried figs in warm water or juice before chopping and adding to the dough.
4. Store the baked cookies in an airtight container to maintain their freshness and chewiness.
By following these tips, you’ll elevate your fig x cookies to a whole new level of deliciousness that will impress your family and friends during the holiday season.
Variations and Substitutions
Looking to put a unique spin on your fig x cookies? Here are some creative variations and ingredient substitutions to consider:
1. Gluten-Free Option: Replace all-purpose flour with almond flour or a gluten-free flour blend for a nutty and wholesome twist.
2. Vegan Friendly: Swap butter for coconut oil and use a flaxseed egg substitute for a plant-based version of these cookies.
3. Nutty Delight: Add chopped nuts such as walnuts or almonds to the dough for extra crunch and flavor.
4. Citrus Zest: Incorporate lemon or orange zest into the dough for a refreshing citrusy kick.
Feel free to experiment with different flavor combinations and textures to create fig x cookies that cater to your taste preferences and dietary needs. The beauty of baking is in the freedom to customize and innovate, so don’t be afraid to get creative in the kitchen.
Serving Suggestions
Once your fig x cookies are fresh out of the oven and cooled to perfection, it’s time to indulge in their irresistible goodness. Here are some serving suggestions to enhance your fig x cookie experience:
1. Pair these cookies with a steaming cup of spiced chai tea for a cozy afternoon treat.
2. Drizzle melted dark chocolate over the cookies and top with sea salt for a decadent dessert option.
3. Serve the cookies alongside a cheese platter for a sweet and savory contrast that will delight your taste buds.
4. Crumble the cookies over a bowl of vanilla ice cream for a delightful dessert with contrasting textures.
Whether enjoyed on their own or as part of a creative dessert ensemble, fig x cookies are sure to steal the show and leave a lasting impression on your guests. Get ready to impress with these delectable holiday treats!
FAQs
Q: Can I freeze the dough for later use?
A: Yes, you can portion out the dough and freeze it in an airtight container for up to three months. When ready to bake, simply thaw the dough in the refrigerator overnight and bake as directed.
Q: How long will the baked cookies stay fresh?
A: Stored in an airtight container at room temperature, fig x cookies will stay fresh for up to a week. You can also freeze the baked cookies for longer storage.
Q: Can I substitute fresh figs for dried figs in this recipe?
A: While fresh figs can be used, dried figs are preferred for their concentrated sweetness and chewy texture that adds depth to the cookies.
Q: Are fig x cookies suitable for gifting?
A: Absolutely! Package these cookies in a decorative tin or a clear cellophane bag tied with a festive ribbon for a homemade gift that shows you care.
Final Thoughts
As you embark on your fig x cookie baking adventure, remember that the joy is not just in the final product but in the journey of creating something special from scratch. These holiday treats are more than just cookies; they are a reflection of tradition, love, and the simple pleasures of life.
Whether you choose to follow a classic recipe or put your own spin on it, fig x cookies are sure to bring a smile to your face and warmth to your heart. So gather your ingredients, preheat your oven, and let the magic of fig x cookies fill your home with the spirit of the holiday season. Happy baking!

Savor Delicious Fig X Cookies: A Holiday Must-Try Treat
Delightful fig x cookies that are a celebration of flavor, texture, and tradition. These cookies are a harmonious blend of sweetness from figs, warmth from spices, and richness from buttery dough. Perfect for the holiday season or any festive gathering.
Ingredients
- 1 cup dried figs, chopped
- 2 cups all-purpose flour
- 1 cup butter, softened
- 1 cup sugar
- 2 eggs
- 1 tsp baking powder
- 1 tsp cinnamon
- 1/2 tsp nutmeg
- 1/4 tsp cloves
- 1 tsp vanilla extract
Directions
-
Preheat the oven to 350°F (180°C) and line a baking sheet with parchment paper.
-
Cream together butter and sugar until light and fluffy.
-
Add eggs one at a time, beating well after each addition. Stir in vanilla extract.
-
In a separate bowl, combine flour, baking powder, cinnamon, nutmeg, and cloves. Gradually add dry ingredients to the wet ingredients, mixing until a dough forms.
-
Fold in the chopped dried figs until evenly distributed throughout the dough.
-
Portion out the dough onto the prepared baking sheet. Flatten each cookie slightly with the back of a spoon.
-
Bake for 10-12 minutes or until edges are golden brown. Cool on the baking sheet before transferring to a wire rack.
-
Serve and enjoy!