
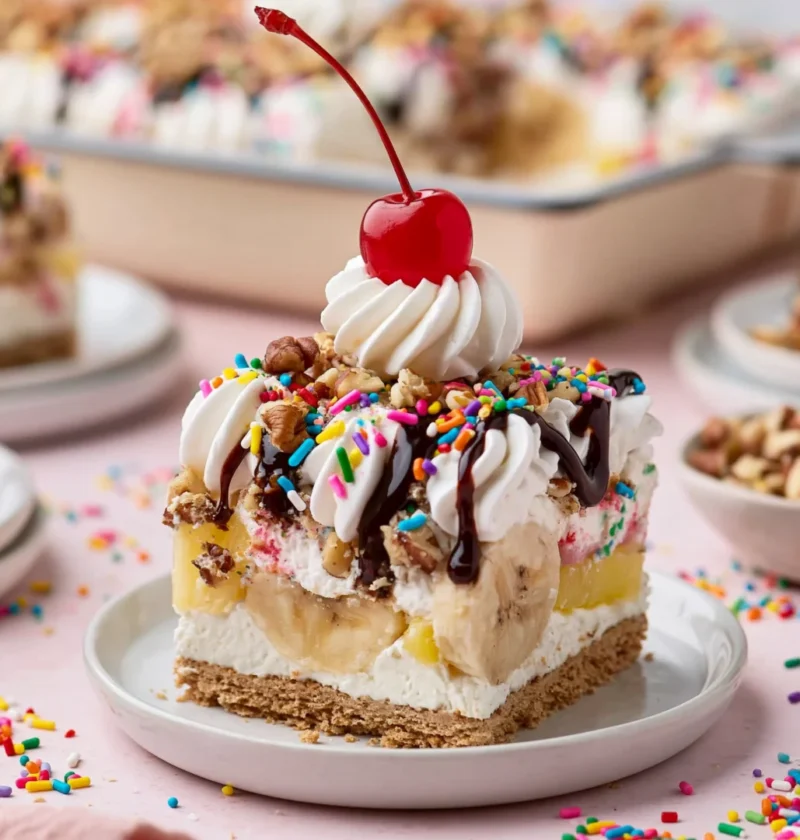
Summer is the perfect time for light, refreshing desserts, and there’s nothing quite like a No-Bake Banana Split Cake to satisfy your sweet cravings without turning on the oven. This delightful dessert combines the classic flavors of a traditional banana split—rich chocolate, smooth cream cheese, fresh bananas, and fluffy whipped cream—into a no-bake cake that’s both easy to prepare and indulgent to eat. The beauty of this cake lies in its layers that meld together to create a tropical paradise in every bite. Perfect for family gatherings, summer parties, or simply to enjoy at home, this dessert will leave everyone asking for seconds! The simplicity of preparation allows you to spend more time enjoying the company of friends and family rather than slaving away in the kitchen. Each slice of this No-Bake Banana Split Cake is not just a treat for the taste buds but also a feast for the eyes with its colorful layers and creamy textures.
Ingredients
- For the Crust:
- 1 ½ cups graham cracker crumbs
- ½ cup unsalted butter, melted
- ¼ cup granulated sugar
- For the Filling:
- 8 oz cream cheese, softened to room temperature for easier blending
- 1 cup powdered sugar, sifted to avoid lumps, ensuring a smooth texture
- 1 teaspoon vanilla extract, preferably pure for the best flavor, enhancing the overall taste
- 1 cup chocolate whipped cream (store-bought or homemade for a personal touch)
- For the Toppings:
- 2 ripe bananas, sliced just before serving to prevent browning and maintain freshness
- ¼ cup chocolate syrup, use high-quality for a richer taste and a more decadent finish
- ¼ cup crushed nuts (e.g., walnuts or pecans, toasted for added flavor and crunch)
- Whipped cream for garnishing, ideally homemade for a fresh taste that complements the cake
- Maraschino cherries for garnish (optional, but they add a classic touch and a pop of color)
Note: For an extra flavor boost, consider using high-quality chocolate whipped cream or even making your own using heavy whipping cream and cocoa powder. The choice of bananas is also vital; opt for medium to large-sized, perfectly ripe bananas for optimal sweetness and texture. You can learn more about this topic, which delves into the history and variations of this beloved dessert.
Steps / Instructions
- Prepare the Crust: In a medium bowl, combine the graham cracker crumbs, melted butter, and granulated sugar. Mix thoroughly until the crumbs are evenly coated and start to clump together, resembling wet sand—a sign you’ve got the right consistency.
- Form the Base: Press the crumb mixture firmly and evenly into the bottom of a 9×13 inch baking dish to create a solid layer. Use the back of a measuring cup or your hands to achieve an even and compact crust. Refrigerate while you prepare the filling to set the crust, which helps ensure a sturdy foundation.
- Make the Cream Cheese Filling: In a large bowl, beat the softened cream cheese with an electric mixer until it is completely smooth and creamy with no lumps remaining. Gradually add the powdered sugar and vanilla extract, mixing until well combined, fluffy, and slightly thickened—this will help create a rich filling.
- Fold in the Chocolate Whipped Cream: Gently fold the chocolate whipped cream into the cream cheese mixture using a spatula or a wooden spoon until just blended. Be careful not to over-mix, as you want to maintain the light and airy quality of the whipped cream that makes this filling so delightful.
- Layer the Filling: Spread the cream cheese mixture evenly over the chilled graham cracker crust. Use a spatula to smooth the top, ensuring the filling is evenly distributed and looks inviting; this not only enhances the visual appeal but ensures every bite is delicious.
- Add the Banana Layer: Arrange the sliced bananas evenly over the cream cheese filling, gently pressing them in to create a solid layer. This adds both flavor and a pleasing visual element to the cake, making it more enticing for your guests.
- Drizzle with Chocolate: Pour the chocolate syrup generously over the banana layer, allowing it to cascade down slightly and create a beautiful marbled effect. If desired, sprinkle the crushed nuts over the top for added texture and crunch, enhancing the overall experience.
- Final Touch: Spread a layer of whipped cream over the entire cake, smoothing it out for a clean and elegant finish. Top with maraschino cherries if using, which will add a pop of color and a hint of nostalgia, making the dish feel extra special.
- Chill and Serve: Cover the cake with plastic wrap or a lid and refrigerate for at least 4 hours, or overnight for the best results, as this allows the flavors to meld beautifully. This chilling time is crucial; cut into squares to serve and enjoy your No-Bake Banana Split Cake!
Tips & Tricks
For the best results with your No-Bake Banana Split Cake, consider these tips: Check out our related guide for more tips on achieving the perfect dessert. These insights can provide you with additional techniques and ideas to elevate your baking skills.
- Storage: Store leftovers in the refrigerator for up to 3 days. Be mindful that the bananas may brown, so it’s best enjoyed fresh. To slow down browning, you can toss the banana slices in a little lemon juice, preserving their bright appearance and flavor.
- Make-Ahead: This cake is perfect for making ahead of time. Prepare it a day before serving to allow the flavors to meld and intensify, resulting in an even more delicious dessert that will impress your guests.
- Avoid Soggy Crust: Ensure the crust is pressed firmly to eliminate air pockets and chill it before adding the filling to prevent it from getting soggy. This will ensure a sturdy base for your layers and a satisfying crunch in every bite.
- Elevate the Flavor: Add a sprinkle of toasted coconut or a layer of crushed pineapple for extra tropical flavor. A drizzle of caramel sauce can also enhance the dessert, making it even more decadent; these additions can provide a delightful contrast to the other flavors.
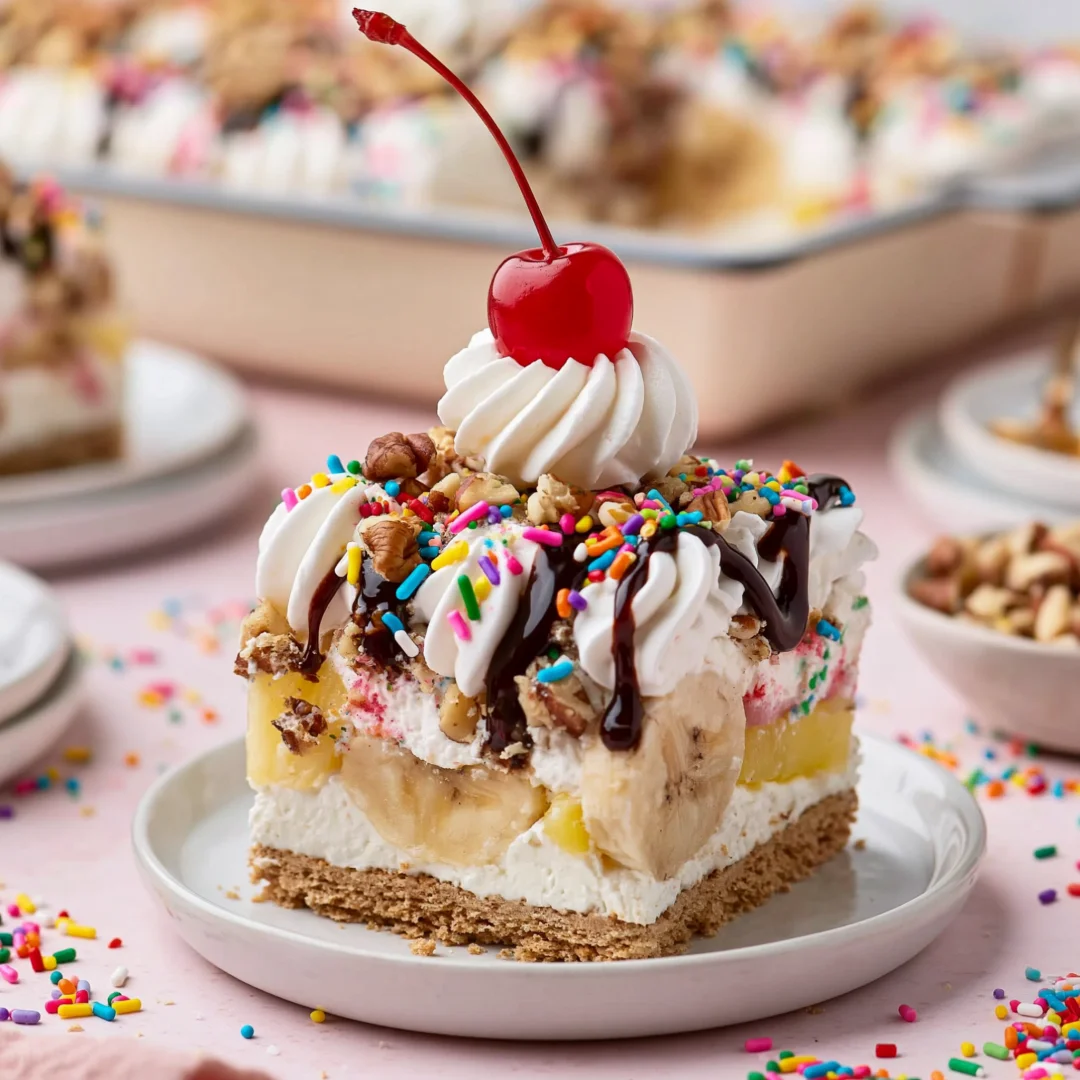
No-Bake Banana Split Cake
Summer is the perfect time for light, refreshing desserts, and there’s nothing quite like a No-Bake Banana Split Cake to satisfy your sweet cravings without turning on the oven. This delightful dessert combines the classic flavors of a traditional banana split—rich chocolate, smooth cream cheese, fresh bananas, and fluffy whipped cream—into a no-bake cake that’s both easy to prepare and indulgent to eat.
Ingredients
- 1 ½ cups graham cracker crumbs
- ½ cup unsalted butter, melted
- ¼ cup granulated sugar
- 8 oz cream cheese, softened
- 1 cup powdered sugar, sifted
- 1 teaspoon vanilla extract
- 1 cup chocolate whipped cream
- 2 ripe bananas, sliced
- ¼ cup chocolate syrup
- ¼ cup crushed nuts (e.g., walnuts or pecans)
- Whipped cream for garnishing
- Maraschino cherries for garnish (optional)
Directions
In a medium bowl, combine the graham cracker crumbs, melted butter, and granulated sugar. Mix thoroughly until the crumbs are evenly coated and start to clump together.
Press the crumb mixture firmly into the bottom of a 9x13 inch baking dish to create a solid layer. Refrigerate while you prepare the filling.
In a large bowl, beat the softened cream cheese with an electric mixer until smooth. Gradually add the powdered sugar and vanilla extract, mixing until fluffy.
Gently fold in the chocolate whipped cream until just blended.
Spread the cream cheese mixture evenly over the chilled graham cracker crust.
Arrange the sliced bananas evenly over the cream cheese filling.
Pour the chocolate syrup generously over the banana layer.
Spread a layer of whipped cream over the entire cake. Top with maraschino cherries if using.
Cover the cake and refrigerate for at least 4 hours, or overnight. Cut into squares to serve.
Nutrition Facts
Recipe Reviews
- ★★★★★
Excellent recipe!
Leave a Reply
Your email address will not be published. Required fields are marked *


Excellent recipe!