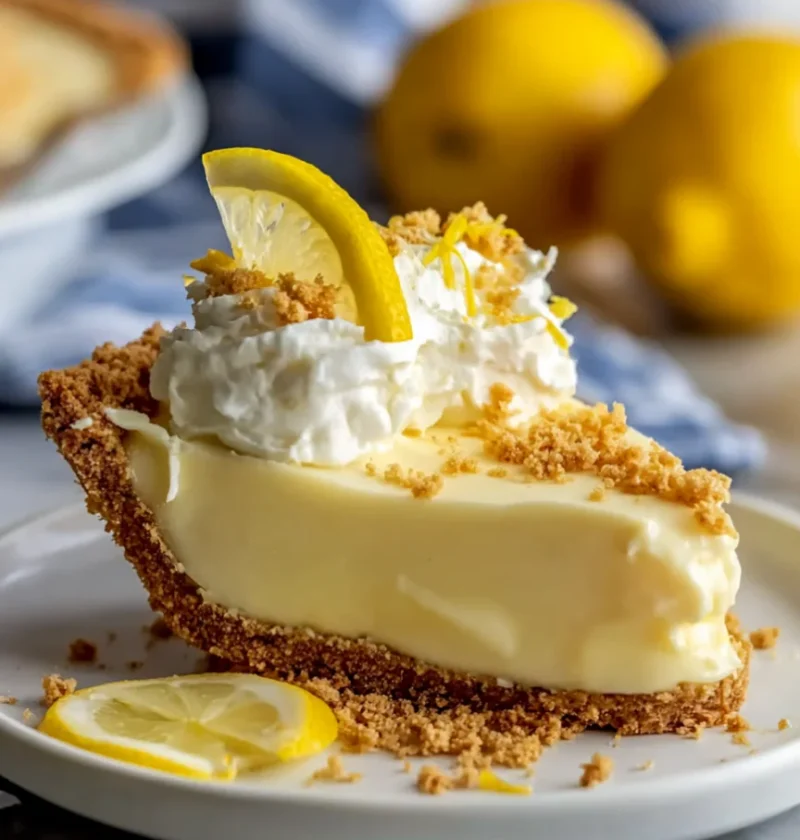
The No-Bake Cream Cheese Lemonade Pie is a delightful dessert that perfectly captures the essence of summer with its refreshing citrus flavor and creamy texture. This pie is not only incredibly easy to make but also provides a burst of brightness that can elevate any gathering. Whether it’s a backyard barbecue, a potluck, or simply a sunny afternoon at home, this dessert serves as a fantastic way to beat the heat without turning on the oven. The combination of cream cheese and lemonade creates a luscious filling that is both tangy and sweet, making it a hit among dessert lovers. Plus, it requires minimal effort and ingredients, making it a go-to recipe for busy days and spontaneous gatherings, ensuring you spend more time enjoying the company than slaving away in the kitchen. The No-Bake Cream Cheese Lemonade Pie also offers versatility, as it can easily be adapted for various occasions and preferences, making it a staple in many home kitchens. In fact, this pie can become a family favorite, often requested during summer celebrations or holiday gatherings, where its lightness provides a refreshing end to a rich meal. Its bright flavors and creamy texture are so inviting that one slice is rarely enough, leaving your guests craving more. Additionally, this pie can inspire creativity in presentation, allowing you to personalize your dessert for the occasion.
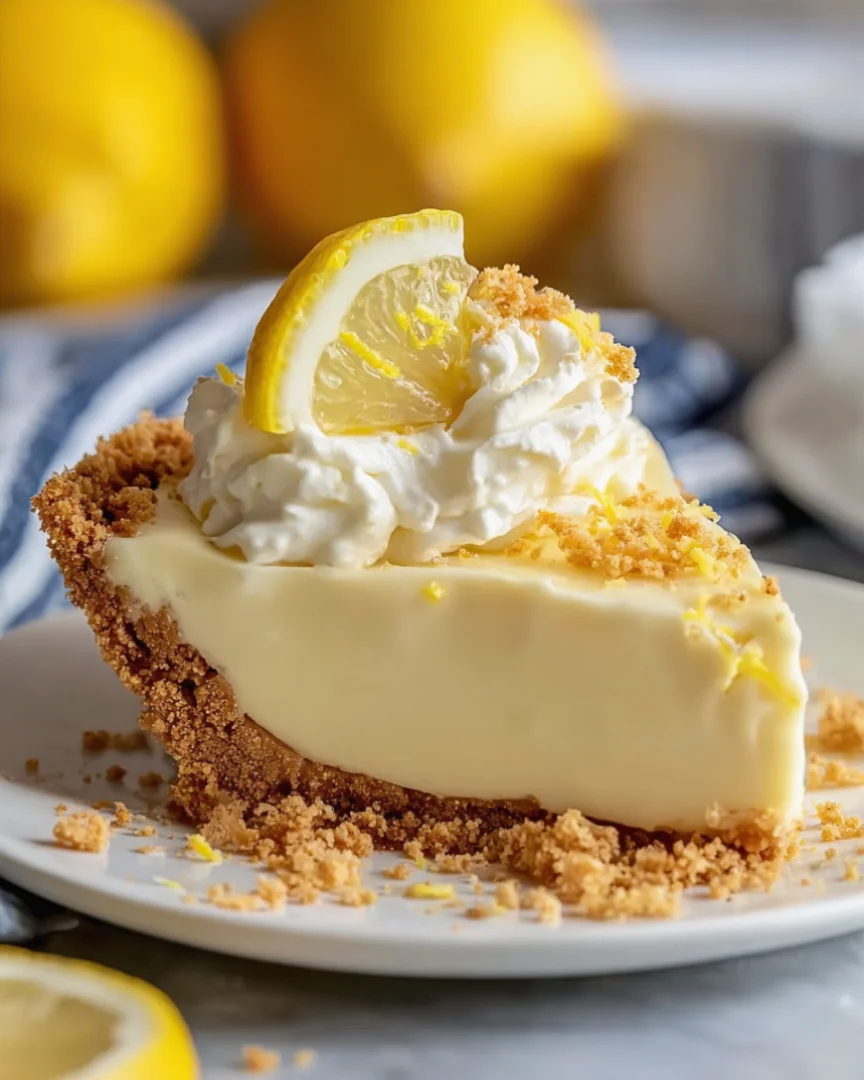
Table of Contents
Ingredients
- For the crust:
- 1 ½ cups graham cracker crumbs
- ½ cup unsalted butter, melted
- ¼ cup granulated sugar
- 1 (8 oz) package cream cheese, softened
- 1 cup powdered sugar
- ½ cup fresh lemon juice (about 2-3 lemons)
- 1 tablespoon lemon zest
- 1 (8 oz) container whipped topping, thawed
- Additional lemon zest
- Fresh mint leaves
- Lemon slices
Steps / Instructions
- Prepare the crust: In a medium mixing bowl, combine graham cracker crumbs, melted butter, and granulated sugar. Mix until the crumbs are evenly coated and the mixture resembles wet sand. This process ensures the crust holds together beautifully once set. If the mixture feels too crumbly, add a little more melted butter to achieve the desired consistency. For an enhanced flavor, consider using flavored graham crackers for a unique twist on the crust.
- Form the crust: Press the crumb mixture firmly into the bottom and up the sides of a 9-inch pie pan. Use the back of a measuring cup or your fingers to create an even layer. Make sure to press down hard enough so that the crust doesn’t crumble when serving. Place it in the refrigerator to set while you prepare the filling, allowing the butter to firm up for better stability. This chilling period is critical; it allows the crust to firm up, making it easier to slice once the pie is completed. A well-formed crust will provide the perfect backdrop for the creamy filling, ensuring a delightful texture with each bite.
- Make the filling: In a large mixing bowl, beat the softened cream cheese with a hand mixer until smooth and creamy. This should take about 2-3 minutes. Ensure the cream cheese is fully softened, as this will significantly affect the texture of the filling. You can microwave the cream cheese in 10-second intervals if you forget to leave it out beforehand, but be careful not to melt it. Achieving a silky-smooth consistency at this stage is vital for the overall mouthfeel of the pie.
- Add sweetness: Gradually add powdered sugar while continuing to beat the cream cheese, ensuring there are no lumps. Mix until well combined, taking the time to scrape down the sides of the bowl as needed to incorporate all ingredients evenly. This step ensures the pie filling is velvety and sweet, without any graininess from the sugar. Taste the mixture at this point if you prefer a sweeter filling and adjust the sugar accordingly.
- Add lemon flavor: Pour in the fresh lemon juice and lemon zest, then combine everything until the mixture is smooth and creamy. The fresh lemon juice not only adds flavor but also a lovely brightness to the pie. The zest enhances the aromatic qualities, providing a more pronounced lemon flavor that truly shines through. Incorporating the zest not only amplifies the taste but also adds a lovely visual element that hints at the freshness of the ingredients used.
- Incorporate whipped topping: Gently fold in the thawed whipped topping with a spatula until fully integrated, being careful not to deflate the fluffiness. This step is crucial as it gives the filling its light, airy texture that complements the crust. Make sure to fold gently in a figure-eight motion to maintain as much air as possible in the mixture. A light touch here will ensure your pie has that desirable, cloud-like quality that makes each slice a delight.
- Fill the crust: Spoon the cream cheese filling into the prepared graham cracker crust. Smooth the top with a spatula for an even finish. You can also create swirls or peaks for a more decorative touch if desired. This adds a personal touch to your pie, making it visually appealing when served. Consider using a piping bag for a more intricate design if you are feeling creative!
- Chill: Cover the pie with plastic wrap or foil and refrigerate for at least 4 hours, or overnight if possible. This step is crucial for letting the flavors meld and the filling to set properly. The longer it chills, the more the flavors will intensify. A well-chilled pie will slice cleanly, making it easier to serve. If you’re in a hurry, a shorter chill time of at least 2 hours can work, but longer is always better for flavor development.
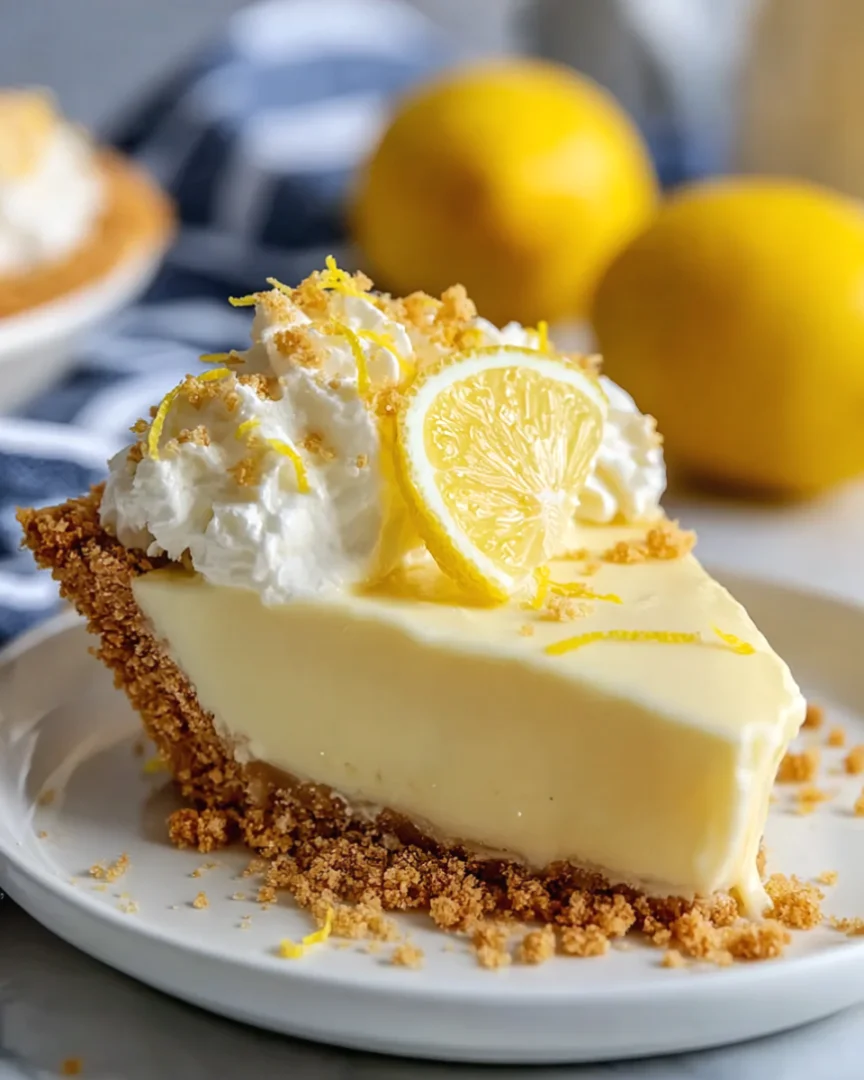
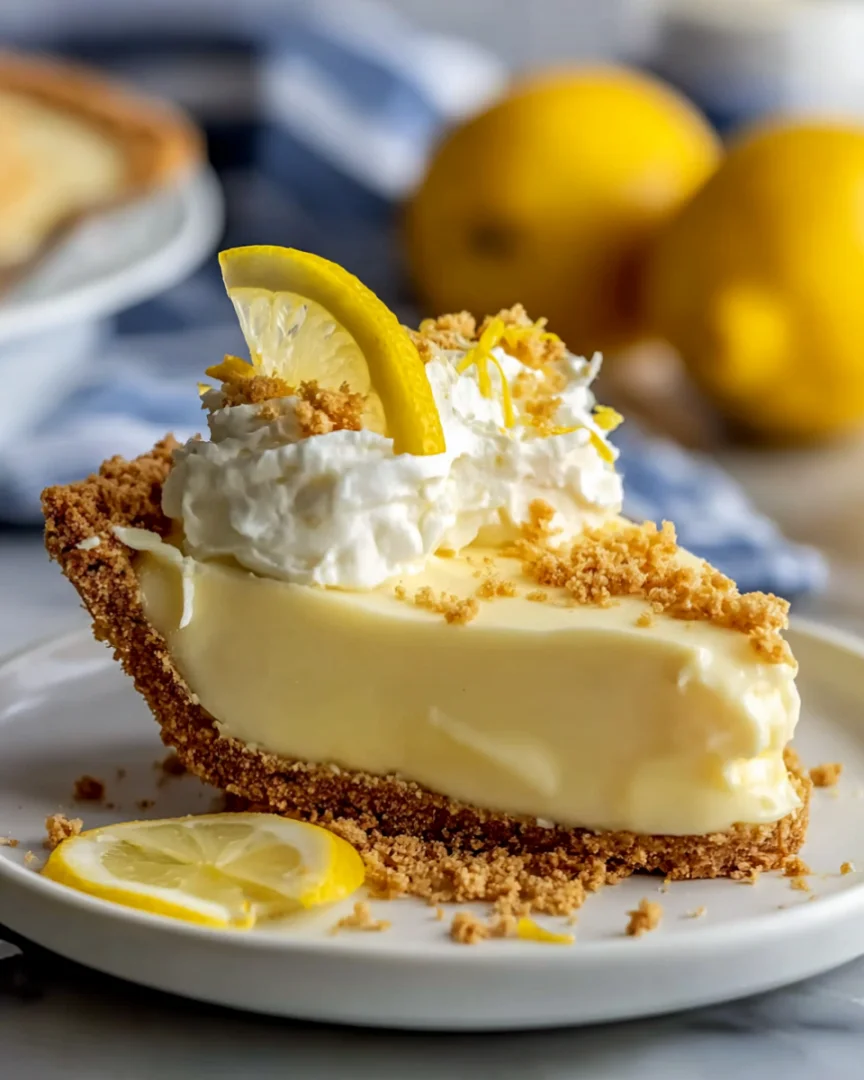
- Serve: Once chilled, remove the pie from the refrigerator, garnish with optional lemon zest, mint leaves, or lemon slices for an elegant presentation, and slice to serve. This finishing touch not only enhances the visual appeal but also adds an extra layer of flavor to each slice. When serving, consider using a serrated knife for cleaner cuts through the creamy filling. Serve each slice on a colorful plate to make the presentation pop, and consider pairing it with a refreshing iced tea for a complete summer experience.
Tips & Tricks
To achieve the best results with your No-Bake Cream Cheese Lemonade Pie, keep these tips in mind: You can learn more about this topic.
- Ingredient quality: Use fresh lemons for the best flavor. The zest should be finely grated, enhancing the aroma and taste of the pie. If fresh lemons are not available, bottled lemon juice can be substituted, but freshly squeezed is always preferable for the best results. Fresh ingredients will amplify the overall taste, making a noticeable difference in how the pie turns out. Consider sourcing organic lemons for a more robust flavor and better zest.
- Softening cream cheese: Ensure your cream cheese is at room temperature before mixing. This prevents lumps and allows for a smoother filling. Leaving it out for about 30 minutes before starting is usually sufficient. If you’re in a hurry, you can cut the cream cheese into smaller pieces to soften it more quickly. The smoother the cream cheese at the start, the less mixing you’ll need to do later.
- Make-ahead: This pie can be made a day in advance, making it perfect for parties or gatherings. Just keep it covered in the fridge until ready to serve. This not only saves time but also allows the flavors to develop further, creating a more harmonious blend of tastes. This is particularly beneficial when serving at larger gatherings, as it allows you to focus on other preparations.
- Storage: Store leftovers in an airtight container in the refrigerator for up to 3 days. The pie will maintain its freshness and flavor when properly sealed. Always check for any off-odors before serving leftovers, especially if they have been stored for a couple of days. If the pie begins to separate, it’s best to consume it sooner rather than later. For longer storage, consider freezing the pie, but keep in mind the texture may change slightly once thawed.
- Avoid over-mixing: When folding in the whipped topping, be gentle to maintain the lightness of the filling. Over-mixing can cause it to lose its airy texture, which is essential for a successful No-Bake Cream Cheese Lemonade Pie. The key is to combine until just mixed; it’s okay if there are a few streaks of whipped topping left. Keeping that fluffiness is crucial for the pie’s delightful mouthfeel.
Variations and Substitutions
Some versions use lemon pudding mix plus evaporated milk for a firmer, more custard-like filling. Others rely on sweetened condensed milk and whipped topping for a lighter, fluffier texture.
You can use a store-bought pie crust to save time or make your own graham cracker crust for more control over the sweetness. Lemon zest, food coloring, or crushed candy can be added if you want a brighter appearance.
Serving Suggestions
Serve the pie cold with whipped topping or a dollop of whipped cream. Lemon slices, mint, or crushed lemon candy make a nice finish.
It pairs well with berries or a light fruit salad if you want to serve it for brunch or a spring gathering. Because it is sweet and tangy, small slices are usually enough.
FAQs
Can I make it ahead of time?
Yes, this pie is meant to be chilled and is often better after several hours in the fridge.
Can I use bottled lemon juice instead of lemonade concentrate?
The sources here emphasize lemonade concentrate because it helps the pie set and gives the best flavor.
Does it need to be baked?
No, the filling is no-bake; only the crust may be baked if you choose to make it from scratch.
Final Thoughts
No-Bake Cream Cheese Lemonade Pie is a simple, refreshing dessert with a creamy texture and bright citrus flavor. It’s easy to make, easy to chill, and especially suited to warm-weather entertaining.
Pro Tips
- Use softened cream cheese.
- Chill the pie fully.
- Stick with lemonade concentrate.
- Garnish just before serving.
Common Mistakes
- Using cold cream cheese.
- Not chilling long enough.
- Substituting plain lemon juice for concentrate.
- Cutting the pie too soon.
Call to Action
Try No-Bake Cream Cheese Lemonade Pie when you want a cool, creamy dessert that tastes like sunshine. It’s a fast, reliable recipe for spring and summer.
No-Bake Cream Cheese Lemonade Pie
The No-Bake Cream Cheese Lemonade Pie is a delightful dessert that perfectly captures the essence of summer with its refreshing citrus flavor and creamy texture. This pie is not only incredibly easy to make but also provides a burst of brightness that can elevate any gathering.
Ingredients
- 1 ½ cups graham cracker crumbs
- ½ cup unsalted butter, melted
- ¼ cup granulated sugar
- 1 (8 oz) package cream cheese, softened
- 1 cup powdered sugar
- ½ cup fresh lemon juice (about 2-3 lemons)
- 1 tablespoon lemon zest
- 1 (8 oz) container whipped topping, thawed
- Additional lemon zest (for garnish)
- Fresh mint leaves (for garnish)
- Lemon slices (for garnish)
Directions
Prepare the crust: In a medium mixing bowl, combine graham cracker crumbs, melted butter, and granulated sugar. Mix until the crumbs are evenly coated and the mixture resembles wet sand.
Form the crust: Press the crumb mixture firmly into the bottom and up the sides of a 9-inch pie pan. Refrigerate to set while preparing the filling.
Make the filling: In a large mixing bowl, beat the softened cream cheese until smooth and creamy.
Add sweetness: Gradually add powdered sugar while continuing to beat the cream cheese until well combined.
Add lemon flavor: Pour in the fresh lemon juice and lemon zest, then mix until smooth.
Incorporate whipped topping: Gently fold in the thawed whipped topping until fully integrated.
Fill the crust: Spoon the cream cheese filling into the prepared crust and smooth the top.
Chill: Cover the pie and refrigerate for at least 4 hours, preferably overnight.
Serve: Garnish with optional lemon zest, mint leaves, or lemon slices and serve.
Nutrition Facts
Recipe Reviews
- ★★★★★
Excellent recipe!
Leave a Reply
Your email address will not be published. Required fields are marked *


Excellent recipe!