
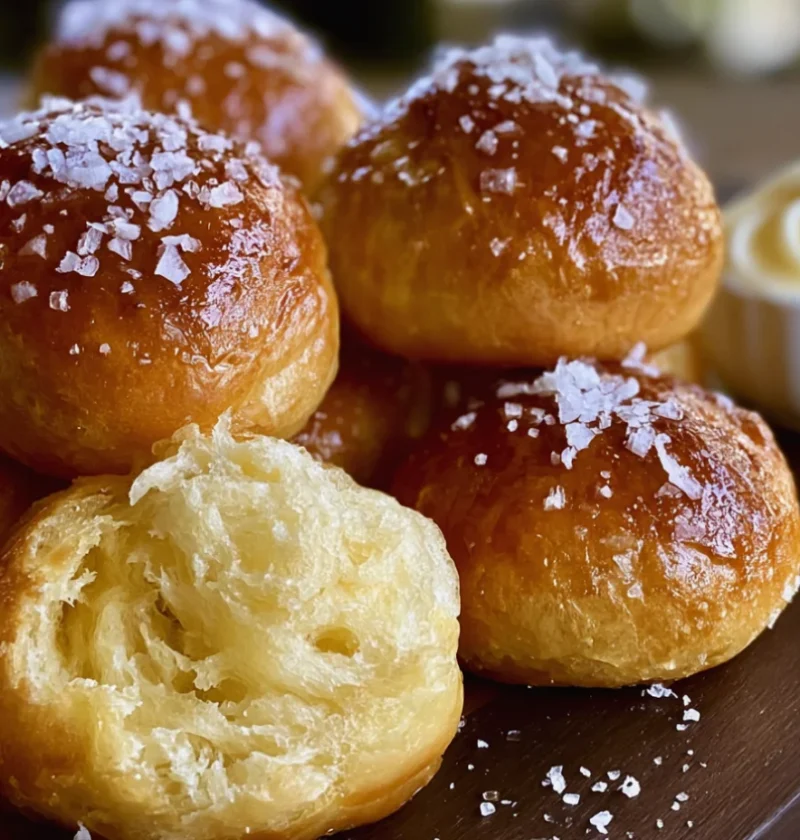
When it comes to comfort food, few things can beat the warm, fluffy goodness of homemade buttermilk dinner rolls. These rolls are not just a side dish; they are a centerpiece of family gatherings, holiday feasts, and cozy weeknight dinners. The addition of buttermilk creates a subtle tang, enhancing the flavor and giving the rolls a tender, melt-in-your-mouth texture. Their golden-brown tops and buttery richness make them the perfect accompaniment to any meal. Whether you’re serving them with a holiday roast or simply spreading a bit of jam on them for breakfast, these rolls will surely delight your palate and warm your heart. Did you know that buttermilk is often used in baking to create a tender crumb? This is just one of the many reasons these rolls are a favorite among home bakers.
Ingredients
To make the perfect buttermilk dinner rolls, gather the following ingredients: You can learn more about this topic.
- Dry Ingredients:
- 4 cups all-purpose flour – Make sure to use high-quality flour for the best results.
- 1 packet (2 1/4 teaspoons) active dry yeast – Fresh yeast is key for a good rise.
- 1/4 cup granulated sugar – This not only sweetens the rolls but also helps to activate the yeast.
- 1 teaspoon salt – Essential for flavor; it also strengthens the dough structure.
- Wet Ingredients:
- 1 cup buttermilk, warmed to 110°F (43°C) – Warming buttermilk aids in yeast activation.
- 1/4 cup unsalted butter, melted – Opt for unsalted butter to control the salt level in your rolls.
- 1 large egg – This enriches the dough and contributes to its golden color.
- Toppings:
- 2 tablespoons unsalted butter, melted (for brushing on top) – This adds a beautiful finish and extra flavor.
Note: If you don’t have buttermilk, you can substitute it with milk mixed with a tablespoon of vinegar or lemon juice, letting it sit for 5-10 minutes before use. This creates a similar acidity that is essential for the rolls. Check out our related guide for more tips on ingredient substitutions and variations.
Steps / Instructions
- Activate the Yeast: In a small bowl, combine the warm buttermilk, sugar, and yeast. Let it sit for about 5-10 minutes until it becomes frothy. This froth is a sign that your yeast is alive and ready to work its magic.
- Mix the Dry Ingredients: In a large mixing bowl, whisk together the flour and salt until well combined. This step ensures the salt is evenly distributed, preventing any yeast from being inhibited.
- Combine Wet Ingredients: In another bowl, whisk the melted butter and egg together. Once the yeast mixture is ready, add it to the butter and egg. Mixing wet ingredients separately helps to create a uniform dough.
- Bring it All Together: Pour the wet ingredients into the dry ingredients. Stir with a wooden spoon until the dough starts to come together. You may need to use your hands to fully incorporate all the flour.
- Knead the Dough: Turn the dough out onto a floured surface. Knead for about 8-10 minutes until the dough is smooth and elastic. This process develops the gluten, giving your buttermilk dinner rolls their structure.
- First Rise: Place the dough in a greased bowl, cover it with a clean kitchen towel, and let it rise in a warm place for about 1 hour or until it doubles in size. A warm environment is crucial for yeast activity; consider using an oven with the light on.
- Shape the Rolls: Once risen, punch the dough down and divide it into 12 equal pieces. Shape each piece into a ball and place them in a greased 9×13-inch baking dish. Ensure they are evenly spaced to allow for further rising.
- Second Rise: Cover the dish with a towel and let the rolls rise for another 30-45 minutes until they are puffy. This step allows the rolls to achieve their final volume before baking.
- Preheat the Oven: While the rolls are rising, preheat your oven to 375°F (190°C). Preheating is essential; a hot oven will help the rolls rise quickly when placed inside.
- Bake the Rolls: Once the rolls have risen, bake them in the preheated oven for 20-25 minutes, or until they are golden brown on top. They should sound hollow when tapped on the bottom.
- Brush with Butter: Remove the rolls from the oven and immediately brush the tops with melted butter for that irresistible shine and flavor. This not only enhances taste but also gives the rolls a beautiful appearance.
- Cool and Serve: Let the rolls cool for a few minutes before serving warm. Enjoy your homemade buttermilk dinner rolls! They are best served fresh, but can also be enjoyed the next day.
Tips & Tricks
To achieve the best results with your buttermilk dinner rolls, consider the following tips:
- Temperature Check: Ensure your buttermilk is warm but not hot; temperatures above 120°F (49°C) can kill the yeast. A simple kitchen thermometer can help ensure accuracy.
- Kneading Technique: Knead the dough until it is smooth and elastic for the best texture. This usually takes about 8-10 minutes. If the dough feels sticky, don’t hesitate to add a touch more flour as you knead.
- Storage: Store leftover rolls in an airtight container at room temperature for up to 3 days, or freeze them for longer storage. To reheat, wrap in foil and warm in the oven to maintain softness.
- Make-Ahead Options: You can prepare the dough ahead of time and let it rise in the fridge overnight. This slow rise enhances flavor. Just shape and bake when you’re ready!
- Avoid Overbaking: Keep an eye on the rolls as they bake; overbaking can lead to dry rolls. Bake until just golden brown; they will continue to cook slightly after removing from the oven.
Conclusion
Now that you have the perfect buttermilk dinner rolls recipe, it’s time to gather your ingredients and let the baking begin! These rolls promise to be a delightful addition to your meals, bringing warmth and comfort to your dining table. Whether served alongside a hearty meal or enjoyed solo with a pat of butter, they are sure to become a beloved staple in your kitchen.
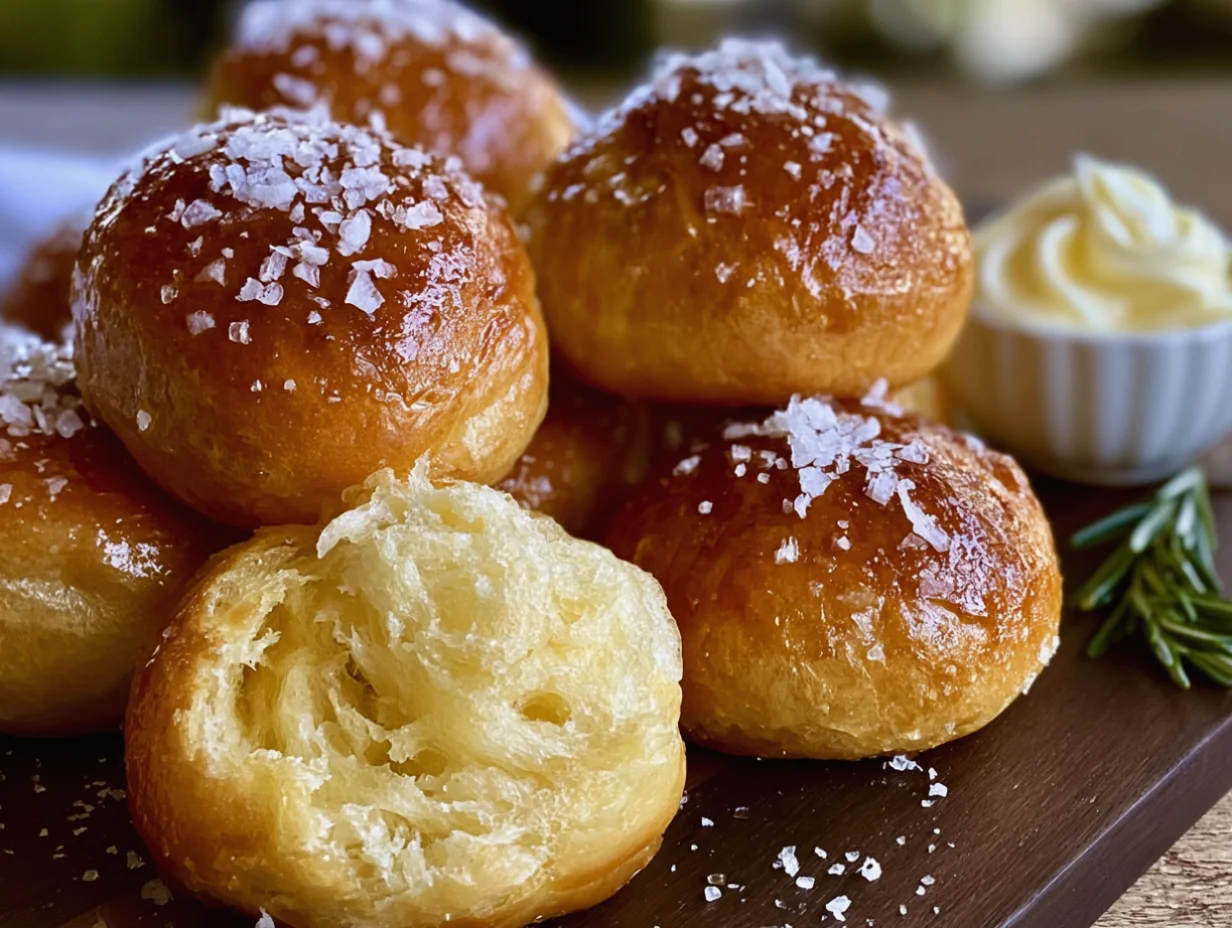
The Perfect Buttermilk Dinner Rolls Recipe
When it comes to comfort food, few things can beat the warm, fluffy goodness of homemade buttermilk dinner rolls. These rolls are not just a side dish; they are a centerpiece of family gatherings, holiday feasts, and cozy weeknight dinners. The addition of buttermilk creates a subtle tang, enhancing the flavor and giving the rolls a tender, melt-in-your-mouth texture.
Ingredients
- 4 cups all-purpose flour
- 1 packet (2 1/4 teaspoons) active dry yeast
- 1/4 cup granulated sugar
- 1 teaspoon salt
- 1 cup buttermilk, warmed to 110°F (43°C)
- 1/4 cup unsalted butter, melted
- 1 large egg
- 2 tablespoons unsalted butter, melted (for brushing on top)
Directions
In a small bowl, combine the warm buttermilk, sugar, and yeast. Let it sit for about 5-10 minutes until it becomes frothy.
In a large mixing bowl, whisk together the flour and salt until well combined.
In another bowl, whisk the melted butter and egg together. Once the yeast mixture is ready, add it to the butter and egg.
Pour the wet ingredients into the dry ingredients. Stir with a wooden spoon until the dough starts to come together.
Turn the dough out onto a floured surface. Knead for about 8-10 minutes until the dough is smooth and elastic.
Place the dough in a greased bowl, cover it with a clean kitchen towel, and let it rise in a warm place for about 1 hour or until it doubles in size.
Punch the dough down and divide it into 12 equal pieces. Shape each piece into a ball and place them in a greased 9x13-inch baking dish.
Cover the dish with a towel and let the rolls rise for another 30-45 minutes until they are puffy.
Preheat your oven to 375°F (190°C).
Once the rolls have risen, bake them in the preheated oven for 20-25 minutes, or until they are golden brown on top.
Remove the rolls from the oven and immediately brush the tops with melted butter.
Let the rolls cool for a few minutes before serving warm.
Recipe Reviews
- ★★★★★
Excellent recipe!
Leave a Reply
Your email address will not be published. Required fields are marked *





Excellent recipe!